Dessert Table Essentials
If you have just started to discover the world of dessert tables and candy buffets and want to start putting them together for your children’s celebrations (and other parties in your life) then there are a few essential items which I feel (as a mum, not a stylist) will help you style a dessert table.
Now of course I am by no means saying you need to have these items to prepare a dessert table or even need to have a “styled” look for a dessert table. Kids birthday parties can be just as wonderful with simpler items a simpler look or even no dessert table! However this is for those of you who DO want to put together a styled look dessert table.
*Click on the images to be taken to the relevant stores where an even larger range of items can be found for your dessert tables*
General tips:
HIRE: Where money and/or storage is an issue you may not wish to purchase the below items for use only a few times a year. In this case please visit the hire category on the Life’s Little Celebration’s children’s party directory to find businesses to hire candy jars, cake stands, tables and more from!
Someone on my facebook page had a great suggestion as well to share items amongst friends in order to help with the cost.
Another great tip shared on the facebook page is to purchase all your essential items in white so they can be re-used for all parties regardless of the colour scheme. I also would suggest buying items in pairs so that your table is symmetrical and coordinated if that is the look you are after.
Table and Tablecloth
Let’s start with the basics. You need a table! Now if your dining table or another table you own is a great size and can be moved easily then that is fantastic. Otherwise a simple trestle tables such as this from Bunnings for $69 will do and they have smaller sizes available too:

Trestle Table from Bunnings
Next is the tablecloth which really sets a lovely setting for all your desserts! It is best to avoid plastic tablecloths or tablecloths that only hang down half way for your dessert table. Certain tables also look great without a tablecloth at all, so it depends on the look you are going for.
Purchasing a gathered or ruffled tablecloth can be an item you will easily use for each party and will also ensure it fits properly for a dessert table look hanging all the way down to the ground:

6ft tablecloth, $60 – Saffy and May

White gathered tablecloth – Saffy & May

White ruffled tablecloth – Saffy & May
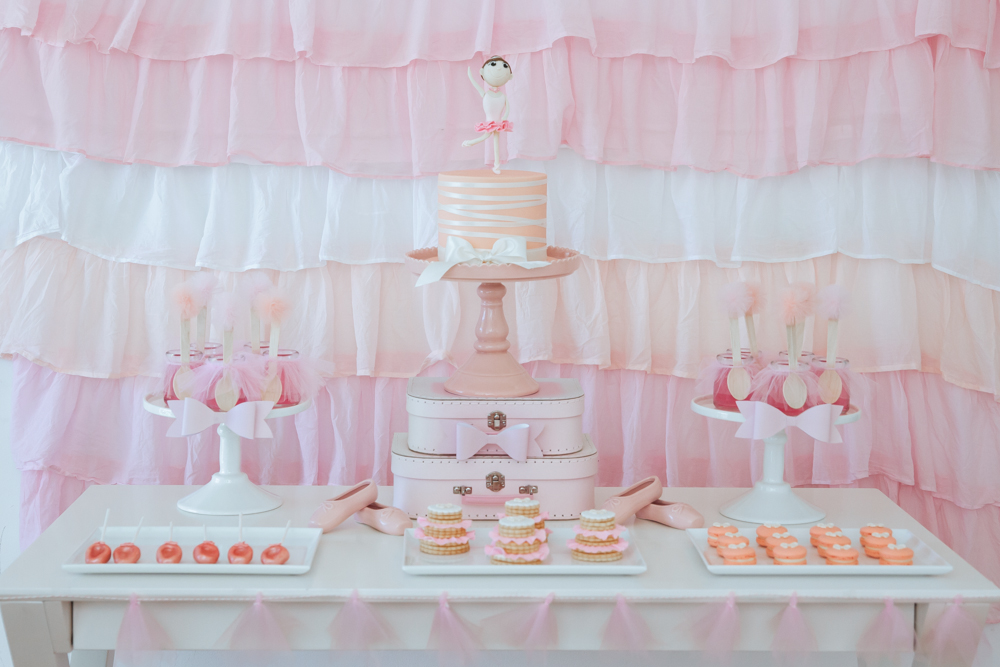
Cake Stands:
The next item would be your cake stand/s. I would suggest going with white cake stands for your main cake as well as 2 more smaller size cake stands that you can also use on your table to display items at a different height. The stores I have included in this post (as well as the other party boutiques on the Directory) also have a range of coloured cake stands and these are also great if you feel it is a colour you will use regularly in your parties.
Displaying desserts on different levels makes a great effect on a dessert table and cake stands is an easy way to make your desserts stand out.
A milk glass cake stand such as this, although more pricey than other options, does have a great height and quality and looks fantastic on a table:

White milk glass cake stand – Sweet Style
Another lovely option for your main cake stand:

White scalloped cake stand – Mum’s Little Party Secret
These smaller size cake stands (also available in a larger size) for $34.95 are a great option for displaying cake pops, macarons and other desserts where you could have one on either side of your main cake stand:

Small ceramic white cake stand – Sweet Tea Party Supplies
Perfect for a rectangle cake stand option:

Rectangle cake stands – Mum’s Little Party Secret
Someone reminded me on my facebook page of a great tip Kara Allen of Kara’s Party Ideas shared on her recent tour of creating your own cake stands using a candle stick holder and platter on top. You can find tutorials online for DIY ideas such as this so definitely worth a google or pinterest search!
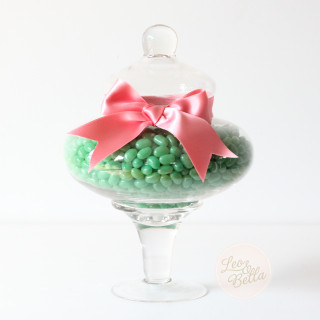
Candy Jars:
If you’re planning on regularly using candy jars on your dessert table, you could start off with 4-6 jars to mix on the table with platters and stands. You could also go with acrylic candy holders if you’re worried about little hands and breakages.
Click on the images to be taken to the stores to see more of a range:
26cm Lisianthus Apothecary Candy Jar – Leo and Bella
27cm Bluebell Apothecary Glass Candy Jar – Leo & Bella

Acrylic candy container scalloped – Just Party Supplies
Acrylic candy jar available in various colours – Fantasy Kids Parties
Risers & Platters
Risers are another important item to use underneath your cake stands and platters to display your cake and desserts at different heights on a dessert table. It is a shame when the desserts at the back of a table and the cake are not seen because they are all at the same height as the front desserts!
You may be creative with items around your house – for my first dessert table I found some dishes at home which turned upside down made fantastic risers for a candy jar!
However other options I like are cardboard suitcases, small wooden boxes/crates and timber boxes:

Set of 3 white cardboard suitcases for $39.95 – Bickiboo

Timber boxes – Saffy & May

White timber riser custom made – Vintage Sew and So

Acrylic riser for dessert table – Occasion by Design
Classic white platters are fantastic for along the front of your dessert table. I love melamine platters such as these as they are at the front of the table within easy reach of childrens hands and are unbreakable:

White rectangular platters – Occasion by Design

White square melamine platters – Occasion by Design
Drinks
Regarding drinks, purchasing a drinks dispenser (although it doesn’t have to sit on your dessert table) is another item you will use many times over. Dispensers such as these are wonderful as it is raised so a cup can easily fit underneath it:

The Jasper drinks dispenser – The Little Big Company
Oasis Glass Beverage Drink Dispenser with Metal Stand 10L – Leo & Bella
If you want to go for mini milk bottles which are such a cute look at a kids party, these mini glass bottles are great for a slightly older child:

Glass clear milk bottles – Love the Occasion
Plastic milk bottles for smaller children are sold from time to time at The Reject Shop. Online you can purchase these from overseas and they can be shipped internationally.

Plastic mini milk bottles – Shop Sweet Lulu
Of course another option is to use mini water bottles from the store and use a printable bottle wrapper to cover the label!
Dessert Holders:
As for the desserts on your table, I find mini dessert holders such as these are fantastic for items such as jelly or mousse!:

Mini glass jars with lids – Sweet Style

Acrylic dessert cup – Occasion by Design
Tiered stands are another way of presenting desserts such as cupcakes and macarons, or also perfect for stylishing presenting savoury items. For a balanced look on your dessert table purchase 2 of the same design:

3 tiered fine bone china cake stand – The Little Big Company

2 tiered cake stand – The Little Big Company
So there you have it, my round up to get you started with the essentials for a styled dessert table!
I hope you have found it useful to give you ideas of what to purchase whether it be online or in store. As I mentioned before – you by no means need all these items to create a dessert table. I have collected bits and pieces over the 3 years since my first child and also hired items when needed!
Enjoy the planning!